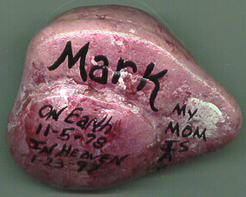
Finishing: After you have written on the rock and allowed it to dry cover entire rock in Polyurethane with sponge brush... makes it shiney and protects the paint.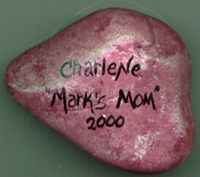 First wash rock and make sure you clean all dirt from rock. Place small amounts of Tapestry wine, white and petal pink on a butter lid or meat tray. Dip sponge in each color and sponge entire rock. You may want to do one side and let it dry, then turn over and do the other side. When rock is completely covered and paint is dry use the black paint with a liner brush and write on rock.
|
Include On Front: Name |
Right side of rock has: My |
Back side of rock has: Your name |
Note: All materials for this craft can be found at Wal-mart, except the angel decals. These I found at Hobby Lobby. However Wal-mart does have flowers and animals...etc. If you wish to substitute something in place of the angels.
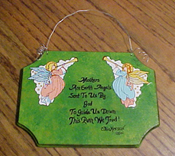
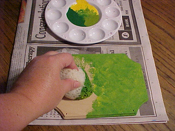 First: Drill small holes in right and left hand corners for attaching craft wire later. If you would rather not have wire for hanging, don't drill holes. Use Aleen's super tacky glue and the tab off a coke can. This makes a great hanger. Using the paints listed or your choice of colors sponge paint all over the plaque. Be sure and cover front and back. Though you will have to allow the front to dry before doing the back. Acrylics on wood dries pretty fast. While your paint is drying type saying and print out. Font size should be 20 or 24. The font I used is Daniela. You will use this with black graphite paper to transfer the writing onto the plaque.
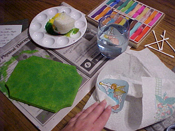 Next: After plaque is dry you are ready to apply the angel
decals. Cut around your angel decals and place in a cup of warm water. This loosens the glue and allows you to remove the decal from the paper and place onto the plaque. After your decals have set in the warm water for just a few min. remove and place onto a towel to remove any excess water. Being careful of the decal blot extra water off with a paper towel. Now you are ready to slide your decal off the paper and place it onto the plaque. I used two angels and placed one on each side. As I will place the writing in the middle of the plaque between the two angels. Blot any extra water from decal when you place it on plaque. After you place decals and while they are drying take a Q-tip and shade the outer grooved edge of plaque.
Next: After plaque is dry you are ready to apply the angel
decals. Cut around your angel decals and place in a cup of warm water. This loosens the glue and allows you to remove the decal from the paper and place onto the plaque. After your decals have set in the warm water for just a few min. remove and place onto a towel to remove any excess water. Being careful of the decal blot extra water off with a paper towel. Now you are ready to slide your decal off the paper and place it onto the plaque. I used two angels and placed one on each side. As I will place the writing in the middle of the plaque between the two angels. Blot any extra water from decal when you place it on plaque. After you place decals and while they are drying take a Q-tip and shade the outer grooved edge of plaque.
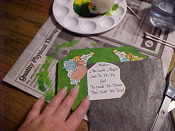 Then: When you have placed your angels on the plaque you are ready to work on the saying. Using the saying you printed out and the graphite paper trace the words onto the plaque. Simple way of making sure writing is centered and even. Make sure you place the words in the middle of the plaque. After you have transferred saying with the graphite use black paint to trace over the wording. Be sure and use a liner brush and a tiny amount of paint. Makes prettier writing.
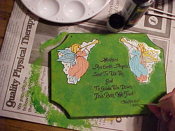 Finishing: You may want to sign the back of your plaque if you are doing this as a gift. After you have allowed drying time for your writing. Use the polyurethane and cover the entire plaque. Again..You will want to do the front and allow it to dry and then do the back. The polyurethane will make the plaque shiny and it will also protect your decals. After front and back have dried completely attach craft wire for hanging. Use a pencil to twist extra wire and allow it to hang.
Mother's
Are Earth Angels
Sent To Us By
God
To Guide Us Down
This Path We Trod!
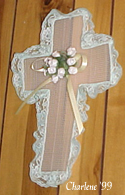
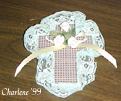 This cross is made from a sheet of plastic canvas. Take pc and cut out cross shape. Glue lace around the cross. Glue ribbon and flowers to the center of your cross. Hot glue a ribbon to back for hanging. Cross can be any size. Use the color of your choice for ribbons and lace.
|
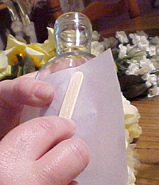
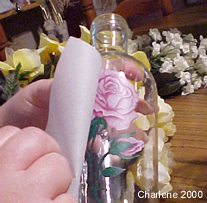
After jar is empty, wash thoroughly and allow to dry. After jar is dry take your rose decal and gently rub it onto the jar (following decal directions). Make sure your decal is straight and hold paper tight without wrinkles.
|
|
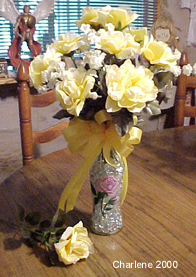
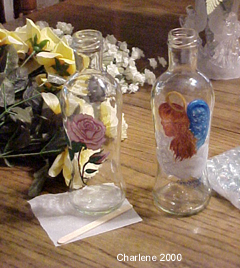 After you have applied your decal to the jar fill it with the clear luster gems. Use yellow ribbon to make a bow for the front of flowers. Cut roses from cluster to have individual roses. This will make arranging flowers easier. Arrange the white flowers and yellow roses in the jar (vase) attractively. Lastly add your ribbon bow to the front.
If you paint you may want to paint your rose onto the front of your vase. You could even change the rose to a sunflower and add sunflowers to the vase. I painted the angel vase that you see in the picture with the rose vase using oil paints. If you are going to use your vase for real flowers then I would suggest you paint your design on.

Note: You can also redo wreaths, by using silk flowers ribbon and floral wire.
Optional: You can also add a note or short poem attached to cross.
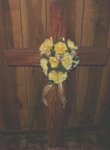
For My Angel 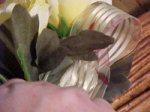 This craft is a way of refreshing flower arrangements placed by grave-side. I removed the faded flowers and ribbon to reuse the cross and stand. Using the wire cutters I cut my silk flowers apart. This will make arranging them easier. Referring to the pictures... place a rose on the cross and pin it
to the cross securely with floral pins. Take ribbon and fold over to make a loop and pin in place, then take another rose and pin it in place alternating between ribbon and roses.... continue doing this until you have filled the center of your cross. If your rose stem is too long use wire cuter to cut it shorter. Make two long pieces to hang and pin them in the center of the cross... and allow them to hang down.
This craft is a way of refreshing flower arrangements placed by grave-side. I removed the faded flowers and ribbon to reuse the cross and stand. Using the wire cutters I cut my silk flowers apart. This will make arranging them easier. Referring to the pictures... place a rose on the cross and pin it
to the cross securely with floral pins. Take ribbon and fold over to make a loop and pin in place, then take another rose and pin it in place alternating between ribbon and roses.... continue doing this until you have filled the center of your cross. If your rose stem is too long use wire cuter to cut it shorter. Make two long pieces to hang and pin them in the center of the cross... and allow them to hang down.
Flowers For My Angel
whom God called to come home.
He now walks streets of Gold,
and has Heaven to roam.
These flowers were lovingly placed here,
by those who miss this Angel so dear.


Copyright ©2000-2009 Marvel Creations. All Rights Reserved. All matching images and content of this website are © Marvel Creations and may not be reproduced. This web site was created and designed by Marvel Creations 2000-2009 which began May 29, 1996. These graphics are for the "exclusive" use of My Parents Are Survivors. Please do not take! Thank you!
|